When we were refurbishing the house a year ago we added a couple of ANNKE C800 cameras as well as an ANKKE NVR to record and manage them. However it turns out that the NVR is a piece of crap with the web UI only being accessable via Internet Explorer.
There’s a few paid for cloud solutions (or better NVRs) that I could purchase but it seemed more interesting (and cheaper) to try and roll my own solution. Happily there’s some great software called Shinobi to help with managing the cameras.
Shinobi only runs on Linux so I decided to try and use a Raspberry Pi 4 8GB as a server, this apparently has enough power to cope with a couple of cameras but would probably struggle with more than that.
Raspberry Pi Setup
I used the offical imager to install the 64bit headless version of Raspberry Pi OS on an SD card and then booted up the Raspberry Pi. I didn’t bother installing the desktop enviroment as I’m planning to run it as a headless server anyway and the Raspberry Pi needs all the resources it can get.
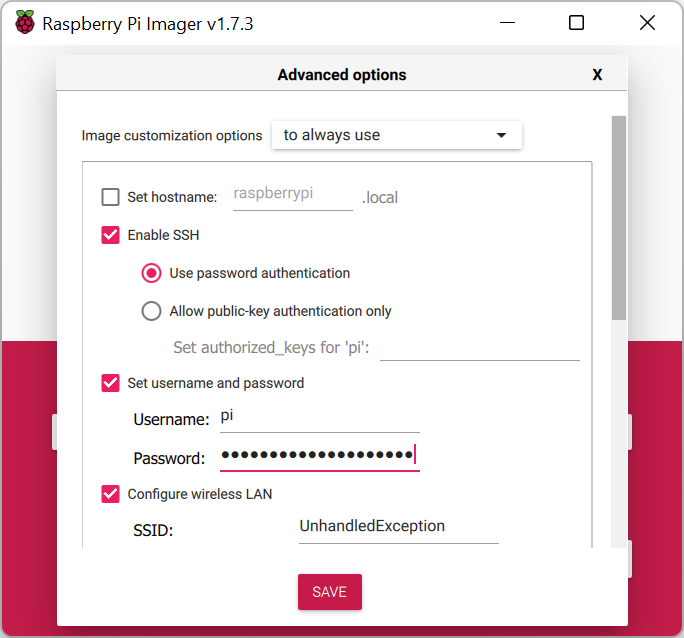
If you’re running a headless Raspberry Pi and you want to use WiFi then this needs to be set up in the image otherwise you won’t be able to connect to it. You also need to enable SSH. This can be done in the advanced options screen (cog icon).
In order to access the Raspberry Pi I used PuTTY to SSH into it as described here.
Shinobi Setup
There’s a guide to installing Shinobi here, it’s pretty simple but the thing I missed is that Shinobi is only accessable as a web interface, the IP address of this web interface is provided at the end of the setup process.
sudo su
bash <(curl -s https://gitlab.com/Shinobi-Systems/Shinobi-Installer/raw/master/shinobi-install.sh)
You then need to log into the IP address provided as the admin user created in the setup and create a new user that can access the main site.
Once Shinobi has been setup you can start recording and viewing events but the site is only available on your internal network. If you want to be able to view it elsewhere then you’ll need to setup a VPN to let you connect back to your home network.
My Annke C800 cameras could previously be added to Shinobi via ONVIF but that seems to have stopped working for some reason. They can be added manually through setting the full source URL in the Shinobi device settings.
rtsp://[USERNAME]:[PASSWORD]@[IPADDRESS]:554/h265/ch1/main/av_streamOpenVPN Setup
There’s a guide to installing OpenVPN here and the setup is pretty simple and you can mostly just accept the defaults.
wget https://git.io/vpn -O openvpn-install.sh && bash openvpn-install.shThe only bit that confused me was when it asked for the name of the first client. The client is the device that will be accessing your VPN server and it’s advised to setup a different client for each device rather than reusing the same client so you can revoke clients where necessary. Given this, just name the client afer device you’ll be running it on e.g. myandroidphone.
When the setup process is done it will output a myandroidphone.ovpn file which you can then use to connect to the VPN. Using PuTTY I opened the file using the following command and copied the content to a new file on my desktop.
cat myandroidphone.ovpnIn order to access the VPN you need to import this file into the OpenVPN Connect app which you install on your client device.
You will probably also need to forward the port that the VPN is using as otherwise this will not be accessable and the client will be unable to connect. In my case the port was 1194.
0 Comments